• Technique
    • Latest Techniques
    • FREE TIPS
    • Quick Tips
    • Video
    • Site Search
    • Blog
    • Archives
  • Mentoring
  • >Online Workshops<
  • Workshops
  • Studio Lighting Books
  • Contact
    • Newsletter
    • Contact
    • Statement
Jake Hicks Photography
  • Technique
    • Latest Techniques
    • FREE TIPS
    • Quick Tips
    • Video
    • Site Search
    • Blog
    • Archives
  • Mentoring
  • >Online Workshops<
  • Workshops
  • Studio Lighting Books
  • Contact
    • Newsletter
    • Contact
    • Statement

Capturing Motion with Long Exposure & Speedlights Outside

Donate & Support

I've always wanted my photography education on here to be free, so although there is no paywall to any of my -Technique Tuesdays-, any and all support is greatly appreciated. ❤️

PLUS: Donate any amount and I’ll send you a link to the hi-res print version of my studio lighting book.

||

PLUS: Donate any amount and I’ll send you a link to the hi-res print version of my studio lighting book. || PLUS: Donate any amount and I’ll send you a link to the hi-res print version of my studio lighting book. ||


For the most part, we rarely need to use flash outside in natural light, as there is typically more than enough daylight to capture the images we need. But, what if we wanted to add a little life to those boring, stationary images?

I recently reviewed the Godox V100 speedlight, and during that review, I played with a few setups, one of which was a simple outdoor setup in natural light. At first glance, the images seemed simple enough, but the shots also demonstrated a sense of movement from the subject.

This very cool motion effect is achieved through long exposure, and yes, typically long exposure leaves you with a blurry mess. However, when you couple that with a flash, you can capture a very cool and visually engaging blend of motion and a frozen subject in the same frame.

I did briefly explain this setup during a recent livestream, but I still had some questions about the details, and to be fair, I do think there are a few small, very important detials with this setup that can make the images significantly better in my opinion and I’ll be going over what those are here in more detial.

What do you need?

The good news is that this is a very easy setup to achieve for most people, as all you really need is a speedlight and a little bit of daylight. Can a different flash work? Yes, if you wanted to use a regular flash and have it placed on a light stand to one side, you can still achieve the same principle of movement and frozen action.

Do I need TTL?

TTL stands for Through The Lens, and it’s a clever technology that allows your flash to adjust its power based on the settings and ingredients you throw at it. Don’t get me wrong, TTL is incredible for setups like this, and it will certainly make your life significantly easier, allowing you to work faster and get more shots in a limited time. However, TTL is not required to make this work. If you don’t have TTL on your speedlight, you’ll just need to work a little harder, not moving too close or far away from the subject once you’ve locked in an initial speedlight power.


The Set Up

Background Choice

As I said, we’ll be setting this up outside, but that doesn't mean we can just do it anywhere. There are certainly things to look for when choosing a spot for this setup. I personally recommend finding a consistently toned background that doesn't have too many very bright and dark colours or highlights and shadows. We will be using this background as our long exposure backdrop, and if certain areas are far brighter or more colourful, they can ruin the long exposure effect by dominating the scene. I personally like the idea of a hedge or shrub, like you see me using here, as that gave me a very evenly toned backdrop to work with.

In the image above, you can see that it is still very much daylight outside. As a result, I brought in a large black flag to try to reduce the light hitting the model, but this wouldn’t have been necessary if I had waited another 30 minutes for the sun to set. You can also see a fan being used here. That is, of course, optional, but it’s another way to add some movement to the shot via some wind in the hair.

Keeping to the Shadows

In keeping with the aforementioned evenly toned background, I would recommend doing this setup in the shadows. Ideally, this setup would be done later in the day when you have a lot more long-thrown shadow areas to choose from and, better still, wait until the sun has just gone down for the best results. The reason for this is twofold: one, bright sunlight can make long exposure images very challenging to achieve, as the sun is simply too powerful, and two, we want an even-toned background with minimal highlights. As soon as the sun has gone down, you can achieve this setup almost anywhere you want.

Locking in the Exposure

This step is going to be the tricky one, but once you have this dialled in, you’re all set. Remember, we want to shoot long exposure shots. First, you need to determine what that means to you personally and the look you're going for. What I mean by that is, how much motion and blur do you want in your shot? For example, a 1-second exposure will give you a lot of motion in the background, versus a shutter speed of 1/15th, which will be far more subtle.

For me, I went for a shutter speed of 1/8th of a second. If you set your camera to that and take a picture outside, even after the sun has set, you’ll immediately see the first problem. The shot is bright, and I mean very bright. What we need to do now is bring that exposure down, whilst keeping that long exposure shutter speed. You have two options. First off, lower the ISO to as low as your camera will go. For me and my Nikon D850 (this is also one of the reasons I love Nikon), I have an ISO 25. This is equivalent to a 2-stop ND filter from a typical ISO 100 value, and I use it all the time.

With your ISO at its lowest, we next need to close down the aperture if the shot is still too bright (it will be). This varies, of course, but for reference, mine was set to f/11. The sun was still very much out for my setup, so that’s why I had to go so high on the aperture. If the sun has gone down for you, this will be less of an issue.

Background Exposure

In the previous section, I mentioned my settings, but I didn't explain what I was exposing for. At this stage, I haven't added the speedlight, so I’m only trying to expose for the background behind the model. For this shot, I don’t actually want the background to be correctly exposed, as I want the model to stand out. With this in mind, I opted to underexpose the background by 1 or 2 stops, and I’ll show an example below of what I mean.

On the left in the shot above, we can see what could be considered a ‘correctly’ exposed background. In the middle is what I set my camera to so as to darken that background down, and on the right, we have the model now standing in with no flash and an underexposed background.

Note that these are only example shots to demonstrate what I mean by underexposing the background, as I’m not using 1/8th of a second exposure here.

Exposing for the model

Once you have your background exposure locked down with your long exposure settings, all you have to do is turn the speedlight on and expose for the model.

If your speedlight has TTL…. you’re done. Simply start shooting.

I will say that although my V100 did have incredible TTL, I did opt to use the exposure compensator to reduce the brightness slightly by around 0.3 to 0.7. This just helped to avoid any blown highlights on the skin that can happen from direct flash.

If you don't have TTL, you just need to adjust the power of your speedlight manually until you’re happy. Of course, without TTL, adjusting for every shot as you and the model move, you’ll need to be conscious of how much you move around. Because as you or the model gets closer to one another at these shorter ranges, the exposure will jump up dramatically very quickly.

Adding the Movement

All that’s left to do now is add the movement. This may seem odd to many of you who’ve never done long exposure photography before, but the basics are quite simple: press the shutter and then immediately start shaking the camera around. There is, of course, a little more nuance to it than that once you know the effect you're going for, but ultimately, it's you moving the camera that creates the blurred effect.


The Final Shots


TL;DR/ADHD/Artist Setup Explanation

  • wait for the sun to go down

  • find a spot outside with even tone and non-contrasting colours

  • under-exposure your camera for the background with the shutter speed you want

  • turn on TTL on your speedlight

  • press the shutter and start swinging your camera about


Camera Settings

  • Camera - Nikon D850

  • Lens - 24-70mm 2.8

  • Shutter Speed - 1/8th

  • Aperture - f11

  • ISO - 25

  • Kelvin - 5600K

  • Focal Length - 24mm


Further points to consider

Flash Zoom

Because I wanted to see movement in the image, I didn’t want the speedlight to freeze the entire frame. Most speedlights have a zoom function, which allows them to illuminate objects further away if needed with their longer zoom or to illuminate an entire group up close with their wider zoom. So, even though I was using this speedlight up close, I wanted to only flash the top half of the model, allowing the daylight and thus the long exposure movement to illuminate the bottom half.

To achieve this look, I simply set my V100 to maximum zoom, which is typically 105mm. You don’t need to do this, of course, but you may find that it's harder to see the movement in the shot, especially on the model, if her entire body is being lit and frozen by the flash.

The image on the left above is a normal, non-long-exposure image. See how there seems to be a pool of light illuminating the model’s top half? And as you look lower down the image, you’ll see that it gets darker. It’s by using this pool of light on the top half, thanks to the speedlight zoom, that we’re able to leave the bottom half unfrozen by flash. Look again at the right-hand image above, and you’ll see that the spots on the dress aren’t frozen as the flash never reaches them. It's this separation of movement against a frozen image that gives such a sense of movement and energy to the shot.

How much movement?

We’ve established how we technically achieve movement via our longer shutter speed, but how do we manage and control that movement? This is going to be the very creative aspect of this setup, and as I mentioned above, to those of you new to long exposure, it will seem very odd at first to start swinging your camera about after you've pressed the shutter.

On that note, I advise waiting until the shutter has been depressed before initiating the movement. If you start swinging the camera as the flash goes off, you’ll likely get unwanted movement in the final shot.

How you achieve the movement is up to you, but I'd recommend trying a few different motions to see what works best for you. Try moving the camera from left to right or vice versa to instil a sense of model movement. Try moving the camera straight up and down, or even try spinning the camera around using the lens as the axis. This will result in a very swirly pattern, and although very eye-catching, can be a little much.

Lastly, if you have a zoom lens, try taking the shot and then immediately twisting the lens to zoom into the subject while the shutter is open. This can create a very cool effect, and one that really draws the viewer into the shot.

In the example image displayed here, you can see that I've clearly spun the camera on the lens axis after the shot has been taken. By doing this, the further out you go from the centre of the shot, the more prominent and noticeable the motion effect is.


Lastly…

One final note to bear in mind is to use an L-bracket on your camera if you choose to shoot with your speedlight on your camera’s hot-shoe and in portrait orientation. If you fail to do this, your flash will be off to the side and not above the model's eye-line when you turn your camera on its side. This results in some ugly cross-lighting and unflattering shadows, and it is definitely best avoided. Don’t feel bad if you do this though, as I still see scores of photographers and YouTubers making this mistake, so it’s an easy error to make. Thankfully, it’s also very easy to avoid.

In the above image, you see the resulting image from shooting a flash image with your speedlight on your hotshoe and in portrait orientation.

In the above shot here, we see what a huge difference it makes to the quality of the light when you use an L-bracket to keep that speedlight above the model’s eye line.


If you’re interested, you can learn more about the L-bracket and when best to use it here…

You're Using Your Speedlight Wrong!


Also, if you’re interested on my thoughts regarding the Godox V100 Speedlight that I used for this shoot, you can check out my review on it here…

Godox V100 Speedlight Review: This is Cheating!


Donate & Support

I've always wanted my photography education on here to be free, so although there is no paywall to any of my -Technique Tuesdays-, any and all support is greatly appreciated. ❤️

PLUS: Donate any amount and I’ll send you a link to the hi-res print version of my studio lighting book.

||

PLUS: Donate any amount and I’ll send you a link to the hi-res print version of my studio lighting book. || PLUS: Donate any amount and I’ll send you a link to the hi-res print version of my studio lighting book. ||


JHP Livestreams…

I livestream every other Tuesday night via YouTube and there I answer your questions, critique your shots, take community images into Photoshop to work on them and discuss all manner of lighting tips and techniques. I look forward to seeing you and your work there real soon. Jake Hicks Photography - YouTube


All of my more advanced lighting classes are now available online!

||

All of my more advanced lighting classes are now available online! || All of my more advanced lighting classes are now available online! ||

LEARN MORE ABOUT MY ONLINE WORKSHOPS

 
Tuesday 07.15.25
Posted by Jake Hicks
 

Godox V100 Speedlight Review: This is Cheating!

Donate & Support

I've always wanted my photography education on here to be free, so although there is no paywall to any of my -Technique Tuesdays-, any and all support is greatly appreciated. ❤️

PLUS: Donate any amount and I’ll send you a link to the hi-res print version of my studio lighting book.

||

PLUS: Donate any amount and I’ll send you a link to the hi-res print version of my studio lighting book. || PLUS: Donate any amount and I’ll send you a link to the hi-res print version of my studio lighting book. ||


I’ll be completely honest, I was dreading this review. I hadn't used a speedlight since I struggled through art college with one over twenty years ago. That thing was terrible. Almost no power controls beyond bright and brighter, the light was catapulted out of the front and was almost impossible to modify in any way, no matter how many Rizlas we stuck to the front. But, it seems speedlights have come a very long way since then.

Last month, Godox kindly sent me some items for review, including the KNOWLED LiteFlow kit, MS60Rs (review here), as well as the V100, and although I was very excited to test the new kit and explore new ways to get creative with it, I’ve been putting off the V100 review.

What on earth could I do with a speedlight?


Disclaimer: Godox sent me this product for review. They are not paying me for this review and all my opinions are my own.


For clarity, as soon as I left art college, I immediately bought myself four 500W strobes, as trying to make lighting work with that old speedlight was a nightmare. And I never looked back. However, as I mentioned, speedlights have come a long way since then, and as soon as I attached this V100 speedlight to my camera, I was genuinely immediately impressed.

Photography has never been easier….

There I said it. I got my old man quote out of the way early, but it’s true. With mirrorless cameras and real-time EVFs, along with full-colour RGB LEDs, lighting and capturing lighting have never been easier. But what about flash? Has that gotten any easier?

Have you met TTL?!?

TTL is cheating

If you’re not familiar with TTL, it stands for Through-the-Lens. Essentially, the tech fires a flash, it then looks at that initial flash and then immediately fires another flash with any necessary power adjustments it sees fit, and it's actually this second flash that the camera captures.

If you read that and thought I said that the flash makes all the power adjustments itself, you’d be right. And yes, it does all that no matter what your camera settings are. If you think that sounds like cheating, you’re two for two. And let me tell you, the TTL on this V100 NEVER misses!

It’s actually kinda wild how well the TTL on this V100 performs, regardless of what I throw at it; every frame is correctly exposed. And when I say I threw everything at it, I mean, long exposures inside with ambient light, long exposure outside with daylight, very fast shutter speeds, I even used it off-camera with the speedlight in a softbox across the garden from me AND, I even used an old manual focus lens that didn’t have any communication with the camera whatsover and used drop-in apertures… and guess what? Every frame was correctly exposed!

I’m sorry, but if you think that’s not cheating, I don’t know what to tell you.

First Impressions

I’ll share some images down below that showcase the types of shots I took with the V100, but I want to be upfront about this: every single one of them was taken with TTL. Why wouldn't I? Sure, if TTL was struggling, I would have switched to manual mode and adjusted the power to my tastes. But it never struggled.

These wildly fluctuating power requirements were always an issue with old speedlights. The light was typically positioned on top of the camera, and you were often moving, as was the subject. This meant you were constantly getting closer and further away from the subject, and the light was all over the place. That’s clearly a problem of the past, as with the TTL on this thing, you can literally do whatever you want. The thing doesn't even need to be on your camera for it to give you the correct exposure every time.

Let’s look at some shots

First off, let’s keep it simple.

Pretty straightforward so far, right? Indoors against a white wall, obviously, TTL was even breaking a sweat. The resulting light looks as you’d expect from a speedlight. Bright, directional, strong shadows and bright highlights. No surprises here.


If you’re gonna cheat, do it properly.

Note: When shooting in portrait orientation and using the flash on the camera, be sure to use a bracket to keep the light above the lens. Failing to do this is a schoolboy error and well worth avoiding.

The above shot was taken with the speedlight on the hotshoe. That shadow is not good.

The easiest way to avoid this harsh side-shadow is to use an L-bracket. Doing so allows for the speedlight to remain above the lens, and it keeps those shadows looking far more flattering.

In the above shot I’m using an L-Bracket to keep the speedlight above the lens. The shadows look far more flattering now.


Can’t fight nostalgia

Next up, I added some long-exposure shots to the mix.

All that’s going on here is me turning the V100 modelling bulb (focus assist light) on and lowering the shutter speed on my camera to around 1/2 second. The result is a warm glow of movement from the modelling bulb, and then a clean and crisp image is also captured by the flash.

Once again, TTL has barely had its morning coffee, as getting every single shot perfectly exposed while I swing the camera around randomly to add movement to the image is still a breeze for TTL. Again, TTL didn’t flinch at getting these shots perfectly exposed each time, so I haven't actually touched the manual power adjustment on the flash yet.

Note - I mentioned nostalgia at the top, as this style of stark on-camera flash is experiencing a resurgence in weddings. The ‘90s kids are finally getting married, and that tungsten-glow-and-flash shots from our childhood disposable cameras are tough to shake.


Let’s take this outside

Next up, I wanted to try this same long exposure principle, but outside in natural light.

With this next set, I tested a similar long exposure style, but this time, instead of relying on the modelling bulb from the V100, I was using natural light. I simply set my shutter speed to 1/8th of a second and then allowed some natural light to creep in as I moved the camera whilst the shot was being taken. As you can see in the images above, the speedlight was also firing, which resulted in me capturing a frozen image of the model as well as the sense of movement from the daylight.

I love these images and I think they look amazing, but again, I can’t really claim too much credit here as, you guessed it, I had TTL turned on. I pointed the camera in roughly the right direction, and the V100 took care of the rest.

As good as these images were, I needed to feel useful before we wrapped up the shoot, so for the final setup, I decided to take the V100 off my camera and place it on a lightstand with a beauty dish attachment via the S2 S-fit converter. With the V100 on the other side of the garden and being fired into the beauty dish before it reached the model, I was fully expecting to have to take the wheel and help little ol’ TTL out finally.


I’m convinced it’s just magic at this point!

Off-camera flash is a step-up for anyone in terms of complexity, especially if you're incorporating the ambient light as part of the final look.

As we can see, I’ve set the camera to accommodate the natural light as the fill-light. In the shots above, you can see the shadow side of the model’s head, but the natural light is filling those shadows. The main lighting on the model here is coming from the V100 in a collapsible beauty dish attached to the S2 S-fit converter on a lightstand.

To fire the V100, I’m using the X3 trigger on my camera and that is also set to TTL.

Once again, I was merely there to hold the camera as somehow the TTL got every shot correctly exposed, even with it being far away from me and with a modifier attached to it.

I had one last trick up my sleeve though, as I wanted to use my very old manual focus lens (that’s what’s creating the swirlly effect in the background of the final images). This lens does not communicate with the camera in any way, and it does not even have traditional apertures, as the f-stop of this lens is changed via drop-in and out aperture discs. There was absolutely no way at all for the V100 to know what camera settings I was using.

But of course, it didn’t care. Once again, TTL got every shot correctly exposed, even though I was balancing the daylight as a fill, using the speedlight off-camera, through a modifier, and I was using an ancient lens that obscured the camera settings!

I think that if I’d given the model a tripod, I wouldn’t have needed to be there at all.


What’s going on?

Granted, I’ve taken slight artistic licence with the writing above, and although a little tongue in cheek, the TTL on this V100 is absolutely insane. I know many of you are familiar with how it works, but as I mentioned above, the TTL fires the flash twice: once as a test and then a second time with any necessary adjustments based on the information it gathered from the initial flash.

As the name suggests, it’s using Through The Lens results to make those adjustments, so no matter the modifier, or whatever lens you use, or the camera settings you have, it doesn't care; it’s looking at the image captured with that first flash to make all of its adjustments to second flash.

The results speak for themselves, and you can see them all above. My lighting reviews typically delve into the specs and features, and you can explore all of those for yourself via numerous online reviews, but why would you? This V100 does what you want it to do, quite literally straight out of the box with TTL engaged. As I mentioned, I didn't switch the TTL off at any point during any of the setups above, and why would I? The goal of any light is to illuminate the subject, and TTL does precisely that, regardless of the bizarre lighting scenarios I threw at it.

I assure you, I had every intention of adjusting the power settings manually and adjusting the power up and down, as you'd expect to do with any light, but I really didn’t see the point. Sure, if TTL wasn’t lighting the subject properly, of course I’d jump in to make the necessary changes, and I wouldn't have thought anything of it. In fact, I wouldn't have even marked it down as I wasn't expecting it to succeed given what I was doing…. but it did.


Do you need a speedlight?

At the start of this review, I mentioned that I wasn't looking forward to this. I don’t use speedlights and I never have in my professional career, but that’s because the last time I used a speedlight, it was little more than a flashbang in a pipe. But, they’ve come an awful long way since then.

I think if you’re someone looking for a speedlight, you're likely someone who wants a bright flash to be used on top of your camera most of the time, and occasionally off-camera. If that wasn't the case, you’d be looking at the AD200 instead. So, if you’re after a flash to be used on your camera, TTL is what you’ll be using 99% of the time, and why wouldn’t you? If that’s you, and you’re after TTL, this V100 has that absolutely mopped up, no matter what you might throw at it.


If you still need convincing…

If you still haven’t ordered one yet, let me go over a couple of the other features that you may need.

Interface

The V100 is solely controlled via its touch screen. Yes, it also has a little wheel and button at the bottom, but for the most part, you’ll be using the touchscreen for any adjustments. Multiple menus can be accessed via swiping from left to right as well as top to bottom. These were a little inconsistent, and I invariably accidentally hit the screen when I didn’t need to, but none of this was a game-changer or hampered the V100’s usability.


Battery

Back in my day, we never left the house without a shoebox full of AA’s. Times have changed, and the V100 comes with an impressive lithium battery. I find it impressive, as I only charged it once, and it's still going, even after I accidentally left it on standby for days. I always loved the convenience of AAs, and that you can buy them almost anywhere if the worst happens. But they are a pain when you need to change them. These new lithium batteries last significantly longer and pop in and out with one hand very quickly. I think if I were using this V100 in earnest for my job, I'd grab two or three of these batteries and feel very comfortable that I had the day covered.


Power

I think it’s easy to overlook the very impressive 100W power of this speedlight, given how many other remarkable features this little speedlight has. But 100W packs a punch, and it manages well in almost any situation. Remember, I was using it outside in natural light, and I was firing it through a big beauty dish that has a diffusion cone inside. Plus, it has an 8-stop range, meaning that it’ll also go pretty low in power as well, so if you just need a little fill-light instead of a big, bright key-light, the V100 has you covered.


Fill-Light (sub flash)

The V100 also comes with a little additional mini-flash that can be situated on the front of the V100 and is used as a fill light. Godox refers to this as the ‘sub flash’. You can only use this sub-flash when the V100 is angled up and used as a bounce flash. I know many photographers shoot in this way, and although the stark front-on flash look is making a comeback, bounced flash is typically a little more flattering.

I tested the V100 with and without the front sub-lash, and here are the results below. Both shots are taken with the V100 angled straight up to bounce the light off a white ceiling.

This image was taken without the fill-flash

This image was taken with the fill-flash

As you can see, there is definitely a difference, and the fill-flash certainly helps to add a little light to the shadows caused by the bounce. I couldn’t see any way to adjust this fill-flash manually, so it appears as though you’re at the will of the V100 to decide the output for you, but it did a pretty good job of getting it right for me.


Zooms

Speedlights have been able to adjust the throw or zooms on the flash output for a while, so there were no surprises when seeing it here too. The V100 has 28mm (the widest throw of light), 35mm, 50mm, 70mm, 80mm and 105mm (the tightest spread of light). This is useful as a way to change the look of the light and for the most part I used 105mm to give me a tight pool of light on the model, but I also used the widest 28mm spread when I had the beauty dish attached as that helped spread the light around the modifier.


Modelling Light

One of the best features of the V100 is the modelling light. I’m sure this isn’t new to speedlights, but it’s so useful for focusing, especially in darker environments. You also saw me use it to illuminate some of my shots above when I was shooting long exposure. I should probably make a point here that the modelling lamp itself is very warm in colour temperature, and I’d guess it's around the 2700K-3000K mark, so very reminiscent of tungsten in colour. This isn't a big deal as you’re typically only using it to focus the shot, but it did strike me as odd, given that the flash is daylight at around 5600K, so why make the modelling lamp 2700K? In fairness to Godox, I don’t think this was an oversight. I won't get into rumours here, but I did hear that it was initially supposed to have both warm and cool LEDs as the modelling lamp, so that you could choose. It was supposedly a potential patent infringement, so the cool LED was dropped. Like I say, this is internet hearsay, so feel free to check for yourself. My point here is that I don’t think Godox simply made a weird decision on the LED colour, and again, for me, the warm one is fine; I actually like the nostalgic, warm glow it gives.


X3 Trigger

This review is already getting lengthy, so I’ll keep it brief. But the X3 trigger is an exceptional little piece of kit. I used this trigger on my hotshoe to fire the V100 when it was mounted on my L-bracket, as well as when I was using the V100 off-camera on a lightstand with a beauty dish.

The X3 connected to the V100 very easily, and I never experienced it dropping out or misfiring. I personally love the X3's interface, as it not only features a large touchscreen but also includes three buttons and a dial on the side. This allowed me to make adjustments very quickly and easily with one hand, and it was noticeably convenient to use over other triggers.

Finally!!!

I also just want to make one last point on this trigger, and that's my love of the option to choose the trigger distance. You can select between a 0-30m range and a 30m-100m range. This may not seem like a big deal, but all my other triggers struggle to work when they are positioned too close to the actual flash. This happens more than you'd think, and I’m constantly fighting this issue with ringlights, backing into large umbrellas behind me, and of course, when I use this trigger with the V100 on the L-bracket, which is right next to it. That 0-30m option eliminates all misfires, and regardless of how close the trigger was to the flash, it always fired. I know this is a V100 review, but that feature alone is more than enough to warrant the purchase of this X3.


In conclusion

I already spoke about this above, but if you’re someone who needs a speedlight, AKA a flash that sits on top of the camera, you’d be nothing short of crazy to not use TTL, especially when it’s this good. It literally never misses.

I’m someone who has been shooting for a very long time, and I like to think I have a pretty good grasp of how to use and operate flashes manually in any situation. However, with this TTL, there was really never a moment when I needed to override it. Sure, I used the exposure compensator to reduce it by one or two-thirds to protect skin highlights, but that's a matter of personal preference rather than right and wrong. The V100 has a ton of power in a small package, and it works flawlessly with its X3 trigger when off camera, too.

All this to say that using this speedlight was a ton of fun!

My day-to-day is multi-light setups in the studio, but that’s a lot of work and stress to get some shots. With the V100 on the camera, I never had to think about anything. I was playing with long exposure shots and focusing on capturing some cool movement with the model, but I never once worried about the tech performing, as the TTL system simply never failed. So yeah, using this V100 was actually a ton of fun, and I really do think it would serve anyone looking for a speedlight very well.

Featured model: Jaye Hicks


Products Used

None of these links are affiliate links; they’re only there for your convenience, so feel free to use, not use or find a better deal elsewhere.

Godox V100 Speedlight

Essential Photo Website Link


Godox X3 Wireless Flash Trigger

Essential Photo Website Link


Donate & Support

I've always wanted my photography education on here to be free, so although there is no paywall to any of my -Technique Tuesdays-, any and all support is greatly appreciated. ❤️

PLUS: Donate any amount and I’ll send you a link to the hi-res print version of my studio lighting book.

||

PLUS: Donate any amount and I’ll send you a link to the hi-res print version of my studio lighting book. || PLUS: Donate any amount and I’ll send you a link to the hi-res print version of my studio lighting book. ||


JHP Livestreams…

I livestream every other Tuesday night via YouTube and there I answer your questions, critique your shots, take community images into Photoshop to work on them and discuss all manner of lighting tips and techniques. I look forward to seeing you and your work there real soon. Jake Hicks Photography - YouTube


All of my more advanced lighting classes are now available online!

||

All of my more advanced lighting classes are now available online! || All of my more advanced lighting classes are now available online! ||

LEARN MORE ABOUT MY ONLINE WORKSHOPS

 
Tuesday 07.08.25
Posted by Jake Hicks
 

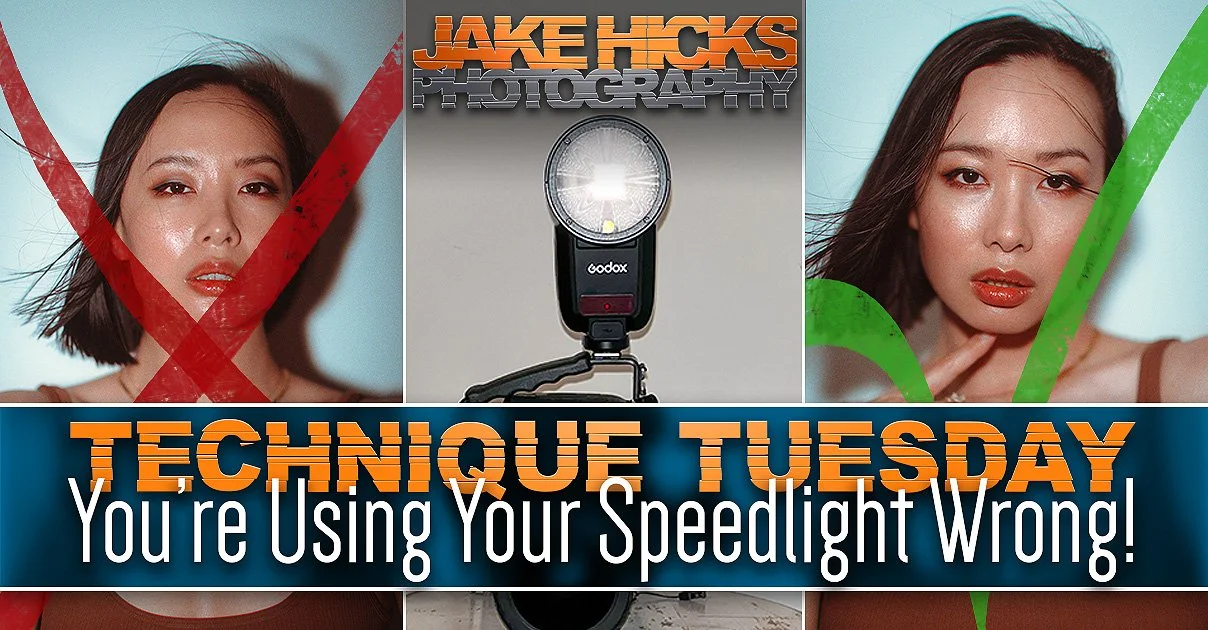
You're Using Your Speedlight Wrong!

Donate & Support

I've always wanted my photography education on here to be free, so although there is no paywall to any of my -Technique Tuesdays-, any and all support is greatly appreciated. ❤️

PLUS: Donate any amount and I’ll send you a link to the hi-res print version of my studio lighting book.

||

PLUS: Donate any amount and I’ll send you a link to the hi-res print version of my studio lighting book. || PLUS: Donate any amount and I’ll send you a link to the hi-res print version of my studio lighting book. ||


I apologise for the TikTok title, but you’re here now, so you may as well stay and see what you’ve been doing wrong with your speedlight all these years.

As a studio shooter for over 20 years, my first instinct is to tell you that the mistake is using a speedlight in the first place. But I recently got the Godox V100 for review, and I’ve actually been having a ton of fun with it. Speedlights have come a long way since I last used them, and they are a much more viable light source today than they used to be.

Plus, a speedlight is often the best choice given the nature of the job. Photographing events, weddings, and the odd hen party for a friend, if you need a lightweight flash that packs a punch and requires zero setup, you’d be crazy to use anything else.

So what’s the issue? What is the mistake I see so many speedlight users making?

The mistake is easily done to be fair, but it's when you shoot your camera in portrait orientation and still have the speedlight attached to your hotshoe on top of your camera. When you shoot in landscape orientation, everything is fine; the flash is on the hotshoe, which is, of course, directly above the lens. The problem arises when you turn the camera and simultaneously the speedlight, to take a portrait, and now that harsh light is now positioned to the ‘side’ of your lens. This results in a super-ugly side-light compared to if you'd repositioned the speedlight back to being above the lens.

As many of you know, lighting 101 dictates that the light source should typically be above the model's eye line. This is simply because it creates a more flattering light on the subject, as we are all so ingrained to see one another’s faces when the light is above them. Whether it be the sun outside or the lights on the ceiling inside, we as humans are drawn to the beauty of a face when it is lit above.

So, when we turn the camera on its side to take a portrait, the flash is sadly no longer above the model, and this can often create some unflattering looking light.

So, how bad is it?

click to fill screen

That’s actually kinda wild, right?!

It looks pretty bad, and that’s simply nothing more than the speedlight being mounted on the camera’s hotshoe in portrait orientation.

It’s crazy, as I’ve seen many people shoot portraits like this, and it always staggers me as being an obvious issue, but I see very few photographers actually address it. In fact, when I wanted to shoot this ‘mistake’ for the article to illustrate the right and wrong way, I knew it would look bad, but even I was shocked at how bad it looked when I tested it. And like I mentioned, it’s actually very easy to fix, and when you do, it's very much worth the effort.


What’s the difference?

Now let’s position the speedlight properly and take the same portrait again.

It’s a night and day difference, right? And all that is simply down to moving that speedlight a matter of inches, and the portrait changes dramatically and is instantly more flattering.


Take the L

Like I said, thankfully, there’s a super-simple solution to this, and all it took was a cheap L-bracket from eBay to solve the issue.

As you can see in the shots above, the L-bracket attaches to the tripod mount at the base of the camera and then extends up the grip on (your preferred) side. Sadly, this bracket is a cold-shoe, meaning it isn’t talking to the camera in any way. I’m using a flash trigger on my camera's hotshoe here, which fires the speedlight. However, you can also connect the camera directly to the speedlight using a short trigger cable instead.


Alternitves

As I mentioned at the top, I had to review this Godox speedlight, so I just wanted to get this L-bracket quickly and cheaply to test everything out properly. You can see in the shots above that I still have strap plates and tether plates on the bottom of my camera that I didn’t even bother to remove to attach the L-bracket. This is far from an ideal solution, and although it worked fine the entire shoot, I think if I were a wedding shooter or event shooter, and I was runing into this lighting issue more frequently and needed a better, more solid solution, I may opt for a small camera rig that has a more solid L-bracket attachment point.

I’ll be honest, I was very surprised at how few of these L-brackets there are. When I was searching, I never once came across a proper brand-manufactured bracket for their speedlights. Maybe I missed them, so if you find one, let me know. But this does seem odd to me. This is a widespread problem that I would assume many photographers encounter, yet I couldn’t find a proper and bespoke bracket for the issue.

Regardless of how you do it, get that speedlight above your lens at all times when switching to portrait orientation. No, the problem isn’t as noticeable when you’re further away from the subject, but that side lighitng is still happening, it’s just less apparent.


Products Used

None of these links are affiliate links; they’re only there for your convenience, so feel free to use, not use or find a better deal elsewhere.

Godox V100 Speedlight

Essential Photo Website Link


Godox X3 Wireless Flash Trigger

Essential Photo Website Link


Camera Flash L-Bracket

eBay Website Link


Donate & Support

I've always wanted my photography education on here to be free, so although there is no paywall to any of my -Technique Tuesdays-, any and all support is greatly appreciated. ❤️

PLUS: Donate any amount and I’ll send you a link to the hi-res print version of my studio lighting book.

||

PLUS: Donate any amount and I’ll send you a link to the hi-res print version of my studio lighting book. || PLUS: Donate any amount and I’ll send you a link to the hi-res print version of my studio lighting book. ||


JHP Livestreams…

I livestream every other Tuesday night via YouTube and there I answer your questions, critique your shots, take community images into Photoshop to work on them and discuss all manner of lighting tips and techniques. I look forward to seeing you and your work there real soon. Jake Hicks Photography - YouTube


All of my more advanced lighting classes are now available online!

||

All of my more advanced lighting classes are now available online! || All of my more advanced lighting classes are now available online! ||

LEARN MORE ABOUT MY ONLINE WORKSHOPS

 
Tuesday 06.24.25
Posted by Jake Hicks
Comments: 5
 

Nanlite Pavoslim 120C - LED RGB Panel Review

Donate & Support

I've always wanted my photography education on here to be free, so although there is no paywall to any of my -Technique Tuesdays-, any and all support is greatly appreciated. ❤️

PLUS: Donate any amount and I’ll send you a link to the hi-res print version of my studio lighting book.

||

PLUS: Donate any amount and I’ll send you a link to the hi-res print version of my studio lighting book. || PLUS: Donate any amount and I’ll send you a link to the hi-res print version of my studio lighting book. ||


I think it’s fair to say that many of you reading this are pretty experienced photographers. If there is one thing that always goes hand-in-hand with experienced photographers, it’s boatloads of photography gear! So, why would you, a skilled photographer with already too much lighitng kit, need yet another LED light? Let’s see why just one more light couldn’t hurt.

I’ve spoken about this topic in previous LED reviews, but I will just reiterate it here: Flash was the jack-of-all-trades, whereas many LED lights are masters of certain looks. A flash can be modified to produce soft, hard, diffused, channelled and even shaped light, but it’s often not the best tool to create those looks. LED tubes, for example, produce a beautiful soft light, but they can't be modified to produce anything else, and LED panels like the PavoSlim 120C fall into the same category. It can create a truly beautiful-looking light, but it can’t do much else. So, is that beautiful light enough?

The Nanlite PavoSlim 120C is powerful enough to be used both in the studio and on location.

What is the Nanlite Pavoslim 120C?

So, is the beautiful light this panel creates enough to warrant another light purchase? As we know, beauty is very often subjective, so let’s dig into the details of what the Pavoslim 120C can do. I’m sure you can see the pictures for yourself littered throughout this review, and you can glean most of what you need to know from those, but let’s break it down for clarity.

  • 150W Full RGB LED panel

  • Measuring 602mm × 306mm with a thickness of 18.6mm (23.7” × 12.06” × 0.73")

  • Weighing 1.76kg / 3.88lb

  • Kelvin Range of 2700K - 7500K (It also has a Green/Magenta tint shift of +/- 150)

  • CRI - 96

  • TLCI - 97

  • With a brightness of around 7000 lux at 3m when set to 5600K

And, as with all decent LED lights today, the PavoSlim also comes with several modes that are all accessible from the main menu on the light.

  • CCT Mode - Your Kelvin range mode

  • HSI Mode - Your Hue, Saturation and Intensity mode

  • RGBW - Red, Green, Blue, White mode.

  • Gel Mode - This mode houses all of the LEE and Rosco Gels by number

  • Effect Mode - Typically used for video, but this is the flickering candle and Police chase, etc, light-loops mode.


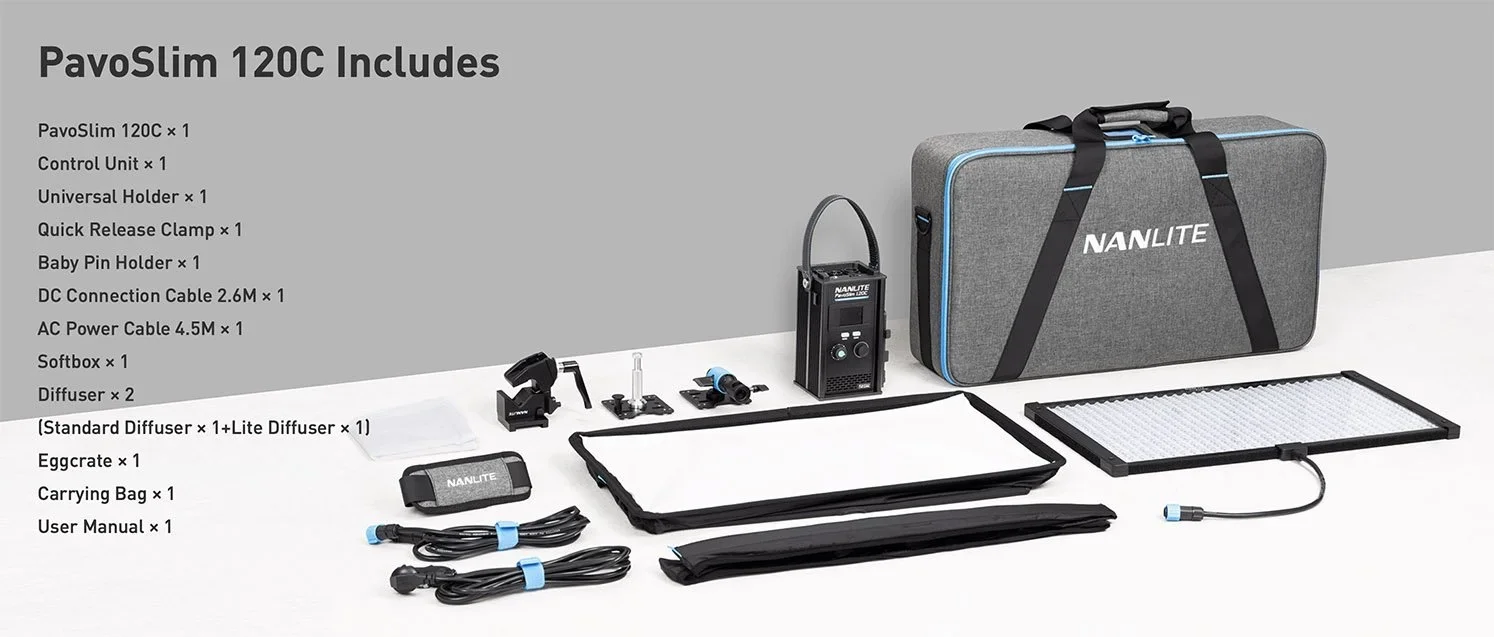
What’s in the Box?

Everything comes in a well padded case

Watch the full unboxing here…

You also have a few mounting options

The control box can be mounted to the stand with the included clamp

Plus, as always, Nanlite’s cables all come neatly coiled with Velcro


Testing the Pavoslim 120C

That’s the elevator pitch, and the stats are cool of course, but what can this LED actually do for us? Is it any good at lighting people?

Click on any of the shots below to fit them to your screen.


The Setup

Cut Out & Keep!

Note that in the images I’ve shown you above, you can’t see the blue stripe on the back, but I’ll share some wider shots below where you can see it more clearly. The purpose of my showing you the shots above was to showcase the quality of light on the skin, and with the wider shots, that wasn’t immediately apparent.


TL;DR/ADHD/Artist Setup Explanation

  • Bring in a white backdrop

  • Shine a slice of hard light and shadow on the backdrop behind model

  • Bring in PavoSlim panel at arms reach distance from the models face

  • Setup large soft box to add fill light and colour blue


Kit Used

  • Nanlite PavoSlim 120C

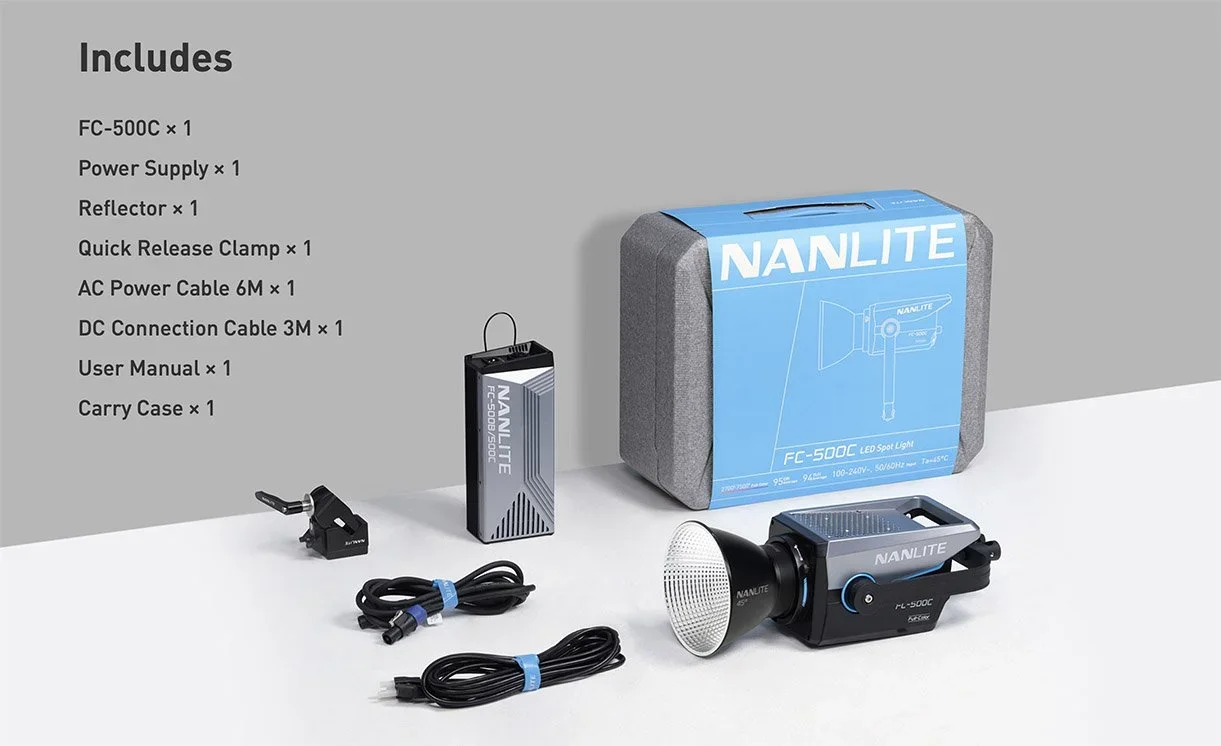
  • Nanlite FC-500C

  • Nanlite FC-120C

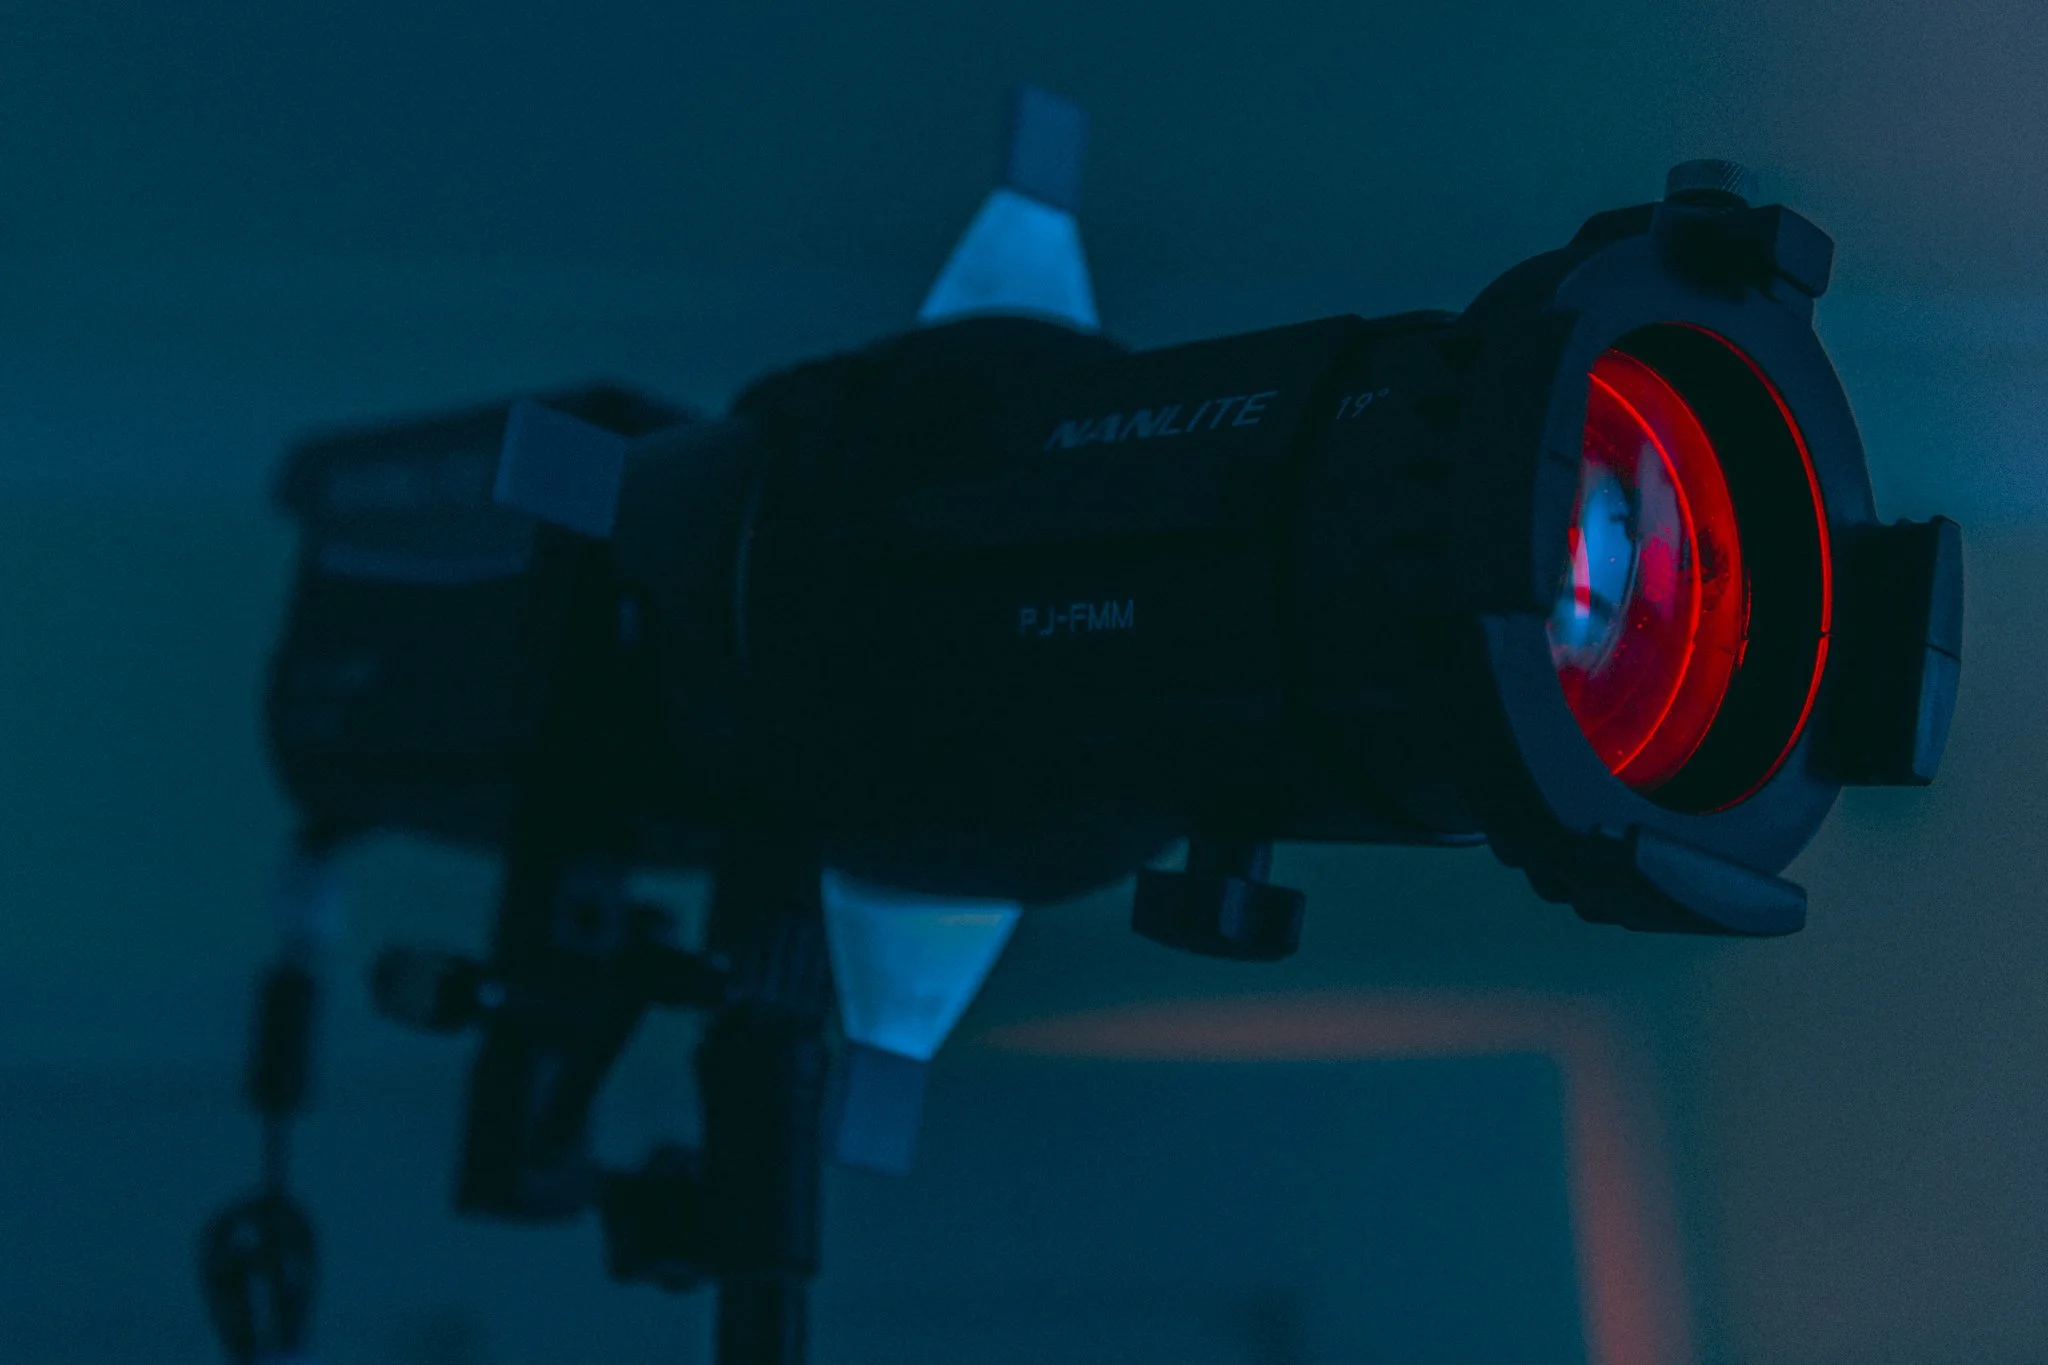
  • Nanlite PJ-BM (Projection Unit)

  • Large Softbox


Camera Settings

  • Camera - Nikon D850

  • Lens - 85mm 1.4

  • Shutter Speed - 1/125th

  • Aperture - f1.4

  • ISO - 50

  • Kelvin - 4500K

  • Focal Length - 85mm


Breaking it Down

The point of this shot was to showcase the quality of light the PavoSlim can create on a subject. To achieve this, my core idea was to bring the panel very close (within arm’s reach of the model) and bathe her in that large light. Once that was done, I simply applied a cut of light to the background behind her using the FC-500C and projection unit, and then filled in all the shadows with a large softbox set to blue light via the FC-120C positioned behind me.

Click to enlarge

In the shot above, I shifted the panel around to be just out of shot above me and the model and angled down. As I mentioned previously, this panel is very close to the model, and with its large surface area in relation to the model, when brought in very close, you can still illuminate the subject evenly and have the light set to a low power. The result of doing this means that the light falls off very quickly down the body, allowing for some very soft, yet engaging lighting.

This large light surface and consequent wall of very even lighting is a unique trait of a panel like this, and it simply isn’t possible with single point lights like flash, as they have to spread their light out from a centralised point—more on this in the next section.


Light Drop-Off

This is kinda tough to explain as it requires us to loosen our death-grip on the photography holy scripture that states that light drops off evenly, and when we double the distance from the light, we quarter the light received. That’s right, I am of course talking about the hallowed ‘inverse square law’. Look, I get it, it even has ‘law’ in the name, we really need to take it seriously and abide by its teachings, but I’ve always found the inverse square law to be a nice teaching aid in school, but in reality, it's a very loose guide at best. I can provide you with plenty of examples of where it falls down in the reality of working in a studio, but for now, I just want you to humour me and at least agree that not all light falls-off equally.

Where this ‘law’ struggles in reality is due to the size of the surface of the light. The inverse square law applies to a single point of light, so, for example, the moon in the sky when we’re standing on Earth, but that law cannot be applied to the moon when we approach it. Its size greatly increases as we approach it, and this is where the law falls apart, as the ISL only applies to single points of light in a vacuum that cannot bounce off of anything else.

The key takeaway here is that if you only use single-point flash, you're good; the holy lighting tenet still applies. However, if we start to use tubes, panels, and any other larger light sources that involve many, many smaller points of light to create their larger source, we need to be mindful that light will fall off differently.

Look, this topic could easily be a whole article in its own right, but this is an LED panel review, so I’ll just wrap this point up with a pretty picture to demonstrate what I mean.

Click to enlarge

In the images above, I have taken two sets of shots. On the left, I have the subject positioned at arm’s reach away from the light. On the right, I have the subject pulled further back at around 2m from the light. I am, of course, using two different types of lights. On top, I have a single point light with a beauty dish, and on the bottom, I’m using the PavoSlim LED panel.

The point I’m demonstrating here is just how much darker the subject is when illuminated by the panel at 2m compared to the beauty dish at 2m. This may not seem hugely significant, but it does show you that not all light drops off evenly. It’s also worth noting that I kept this test practical to a beauty headshot. If I’d shot the single-point images without a beauty dish, the drop-off would be significantly more noticeable, as the beauty dish here is at least spreading the light fairly evenly to begin with.

As I mentioned above, I should make this a full article in its own right, as LEDs and their various shapes and light distributions can open up a lot of new and interesting ways for us to manipulate light on set. I did go into this light drop-off principle in a little more detail in a previous livestream, so if you'd like to see that, take a look at the VOD here and skip to the timestamp of 1:41:45.


Second Setup - Daylight and LED Panel Combined

I also wanted to see how the PavoSlim 120C would fare when used outside in conjunction with daylight. Here’s how it got on.


The Setup

With the soft box grid attached, all of the light goes where you want it which maximises the brightness on the subject.

The panel can easily be oriented vertically in the portrait format. This allows for more light to spread down the body.


Breaking it Down

Whenever I review an LED light, the number one question I always get is something like, “Can it overpower the sun?” Obviously, this is a dumb question, but I think the core of what they’re trying to get to is, “Is it bright enough?”

LEDs aren’t as bright as most flashes, but they are typically bright enough for the vast majority of the things we do. I took this panel outside to use in conjunction with the sun, and this is how I would use a flash as well. I wouldn’t try to overpower the sun with a flash, so yes, in this instance, the LED was indeed ‘bright enough’.

The setup was simple: take the panel outside and set the Kelvin range to 2700K (you can see that in the BTS above, too). Then all I did was set my camera’s Kelvin to around 3500K. Remember: daylight has a Kelvin of around 5600K, so by setting my camera’s Kelvin to a value between the LED and daylight, I achieve a warm tone on the skin from the LED and a blue tone in the surrounding background from the daylight.


Closing Comments on the Nanlite PavoSlim 120C

LEDS have been around for a while now, and much of the tech that was previously reserved for the big-budget movie sets and unaffordable to many of us lowly photographers is finally filtering down to us now. Yes, this light, like many of its competitors, has outstanding colour renditions and the spec sheet speaks for itself, but the PavoSlim is doing a couple of things that are impressive.

Firstly, the PavoSlim’s size and weight. At less than 10cm in thickness, the panel is crazy-slim! And that means it’s unbelievably lightweight too, and at less than 2 kg, I have zero concerns about hanging it up high or even suspending it above a model. The thickness and weight also make it a great choice for suspending over someone for that beautiful, classic top-light look. With its slim size, a top-light is finally possible even in low-ceiling spaces like homes and other tight locations.

The Nanlite PavoSlim 120C is less than 10cm thick!

With this panel being so thin, its also very lightweight at only 1.76kg!

The setup of the PavoSlim is also very quick and simple too. The panel slides out of the case and allows for a sturdy ball-joint mount to be fixed to the back. From there, it can mount to a C-stand and be adjusted quickly to portrait or landscape orientation, and again, thanks to its limited weight, the ball-joint bracket can easily lock the panel in place very snugly.

It’s worth noting here, just in case it wasn't obvious, that the PavoSlim is controlled via an external control box. This separate unit features a screen that provides a clear readout of your current settings, and it is easily mounted to the stand. This control box can either draw power directly from a wall outlet or utilise V-mount batteries on the side to power the panel without the need for external power, which is, of course, very useful when shooting on location or outside.

All of these items come in a very durable and well-padded case, and one thing that was immediately obvious with this arrangement was that, due to the width of the control box, the case had to be fairly deep, and this meant there was also plenty of extra space in the case for other items. Whilst I’m talking about the case, I will also touch on what’s included in there. You have the panel, the control box, the two cables and two mounting options. You also have a couple of options for the light source itself, as you get two thicknesses of diffusion to choose from. I went for the thicker, more diffused option at the cost of a slight loss of power. Plus, you also get a grid that is crazy-easy to put on and take off as you need it.

There is also one other important feature with this light that makes it unique, and that’s the pop-out softbox that is permanently attached to the front of the light if you want. When the panel is stored, the softbox is compressed to the front of the light and held there with velcro. When you remove the light, simply pop open the velcro, and the now-softbox sits proudly off the front of the panel. From here, you can then choose to add the grid to this too.

I store my panel with the softbox pulled in like this…

…but once the velcro is released, the soft box easily pops forward.


Final Roundup of the PavoSlim 120C

This LED light is an excellent panel light, offering a sufficient amount of power for most portrait situations, and it even performed well outside in broad daylight. The light this panel produces on the skin is remarkably clean when used in close, as I showed you above, and if you need a very soft, yet clean key-light, this would make an excellent contender. I currently use a 12-inch circular panel for the job, but this far larger panel may well become its impressive replacement.

The built-in soft box that pops out instantly is a very nice addition, as I would personally never use an LED like this in close with hundreds of exposed LEDs. I would always have a layer of diffusion over them, so having this softbox built-in is very useful. Plus, the very easy-to-attach grid is a nice touch. No more dragging and scratching the velcro grid around the edge of the light, as this just pops on. Again, it makes sense to have the grid on most of the time, as that will maximise the light on the spot you want it.

Yes, this LED has all of the typical modes and features available via the control box (all of this can be adjusted via the Nanlite app too), and although the Kelvin range isn’t the widest at 2700K - 7500K, the Green/Magenta tint adjustment is useful. One other aspect I was missing was the ability to adjust the power in 0.1-point increments. Other Nanlite LED lights have this feature, and I was surprised at how much I used it, so it was a shame to have it taken away here, but maybe that fine control is only possible with COB lights.

The size and weight of this large panel are what really make it an impressive unit, and this will absolutely be the light I use for up high and directly overhead talent in the future and given its low profile, it can also be used overhead in low-ceiling situations too.

Bottom line: If you don’t already have a large LED panel like this one, I’d encourage you to try it out as a key-light for yourself. As I briefly alluded to in this article, a large even spread of light like this can create some truly beautiful drop-off of light on the subject's face when used in close, and you really need to see it for yourself to appreciate how effective it is.


As always, thank you for reading. Hopefully, you learnt something new today. If you did, be sure to check out the rest of my articles, as with over a decade’s worth of -Technique Tuesdays- to work through, I’m sure you’ll find something else of interest. Plus, sign up to my mailing list to be sure not to miss next weeks article.


Donate & Support

I've always wanted my photography education on here to be free, so although there is no paywall to any of my -Technique Tuesdays-, any and all support is greatly appreciated. ❤️

PLUS: Donate any amount and I’ll send you a link to the hi-res print version of my studio lighting book.

||

PLUS: Donate any amount and I’ll send you a link to the hi-res print version of my studio lighting book. || PLUS: Donate any amount and I’ll send you a link to the hi-res print version of my studio lighting book. ||


Products Used

Note: These are not affiliate links; I do not earn anything from you using these links. These links take you directly to Nanlite’s website for further info.

Nanlite PavoSlim 120C

Website Link


Nanlite FC-500C

Website Link


Nanlite FC-120C

Website Link


Nanlite Projection Attachment

Website Link


JHP Livestreams…

I livestream every other Tuesday night via YouTube and there I answer your questions, critique your shots, take community images into Photoshop to work on them and discuss all manner of lighting tips and techniques. I look forward to seeing you and your work there real soon. Jake Hicks Photography - YouTube


All of my more advanced lighting classes are now available online!

||

All of my more advanced lighting classes are now available online! || All of my more advanced lighting classes are now available online! ||

LEARN MORE ABOUT MY ONLINE WORKSHOPS

 
Tuesday 06.10.25
Posted by Jake Hicks
Comments: 4
 

Controlling Practical Lights on Set

Donate & Support

I've always wanted my photography education on here to be free, so although there is no paywall to any of my -Technique Tuesdays-, any and all support is greatly appreciated. ❤️

PLUS: Donate any amount and I’ll send you a link to the hi-res print version of my studio lighting book.

||

PLUS: Donate any amount and I’ll send you a link to the hi-res print version of my studio lighting book. || PLUS: Donate any amount and I’ll send you a link to the hi-res print version of my studio lighting book. ||


90% of our job on set is modifying the light. Pressing the button is the easy bit, but manipulating and controlling the light to get it to go exactly where you want is the real job.

As an aspiring light-whisperer myself, I’ve picked up a few tips over the years, and in recent times, I’ve been fighting with ambient lights more than flash. Sure, ambient light comes in many forms, and my extent of managing daylight involves covering the windows with black velvet and leaving me in a black box. That’s the easy part, now when it comes to controlling the other ambient lights, specifically ‘practicals’ on set, that's a little trickier.

If you’re not aware, ‘practicals’ refers to environmental lights, lights that appear in shot and fit the environment. Lights like table lamps or ceiling lights in a shot are called ‘practicals’ and, as you may imagine, these are typically found on location… but not always.

‘Practicals’ as they’re known are simply light sources that appear in-shot. They can be decorative, but you can also use practicals to illuminate your subject.

In recent years, I've taken to setting up environmental-style shots in a studio, and it’s pretty easy to do. One of the core aspects of an engaging-looking environment shot though, is the practicals, and I do try to bring some into my sets to add a little drama and atmosphere to a shot.

The practical lights can be subtle and in the background, or they can be far more dominant, even significantly lighting the set or the model.


Using Practicals as Keys

Having practicals in the background of a shot can still add a lot of interest and visual depth to a shot, plus, they’re relatively easy to include if they’re not affecting the background and/or model too much. But a lot more care needs to be taken when we want to use practicals to actually illuminate our subject, and even use them as key lights on our subject.

Here we can see the practical light is actually the key light on the model.

It’s tough to argue with the beautiful colour a tungsten bulb can offer too.

I have a few practical lamps that I often take with me on location as they offer a consistent and controllable way to add them in shot, without relying on the luck of the draw when you arrive. The main one I use is a simple IKEA lamp as it’s lightweight, can be broken down and transported very easily and looks generic enough to fit into the background of many shots.

Additionally, if I really want to, I can even use it as my keylight and almost solely illuminate the model with it if I want.


Controlling the Practical

This seems easy enough, right? Place the model beneath the lamp, turn it on, and win. Right? Sadly, not quite as there is one very annoying aspect to these types of lights, and that’s the directionality of their light output.

Ordinarily, many of these ‘standard lamps’, as they’re called, are designed to send light straight up and into the ceiling of your living room or bedroom. This is fine for the most part, as many homes have a white ceiling that isn’t too high, and that lamp light is bounced off the nice white ceiling and falls down with a soft, even light.

This is not ideal when you’re trying to illuminate the model underneath it, though!

The Bulb Splitter

The solution that I found to work best for this issue was to change how the bulb was aligned inside the lampshade. Typically, the bulb sticks straight up, but with this bulb-splitter, I was able to lay the bulb and now, three bulbs, flat. As you can imagine, this now sends light both down and up.


Multiple Benefits

Of course, the core reason I use this bulb-splitter is to lay the bulbs flat and get more light falling down onto the model instead of so much of it being wasted going up. But, there is another huge benefit to this 3-way bulb, and this is, of course, power.

We now have the ability to use three bulbs in the same lamp, and they not only spread the light fairly evenly around the lampshade, but we now also have triple the power to work with. This can be very useful when we’re trying to match the power of tungsten with the power of flash, for example.

Another slightly less obvious benefit that I hadn't anticipated was that with the bulb lying flat and far more prominent in the lampshade, I found the model’s eyes were receiving far more light and subsequently far stronger cathclights, whereas before I might not have seen any at all.


Final Tip

As I mentioned above, with three bulbs now in the lampshade, we have a significantly more powerful light source to work with. I mentioned that this is a great thing when using the lamps alongside flash, as they have a lot of power. Sadly, this extra power from the three bulbs was often too much when I used them alongside LED lights. Rather than removing some bulbs or trying to find bulbs with a lower wattage, I opted for a dimmer switch instead.

These are pretty cheap, and I actually end up using them a lot more than I thought, so I recommend grabbing a couple.


Products Used

No affiliate links or codes here, so take a look for the best results yourself, as there is a wider variety of options now, and some even include more bulb options, individual switches, and more adjustability. I got mine several years ago, but it’s something like this one here.

3-Way Bulb Splitter


As always, thank you for reading. Hopefully, you learnt something new today. If you did, be sure to check out the rest of my articles, as with over a decade’s worth of -Technique Tuesdays- to work through, I’m sure you’ll find something else of interest. Plus, sign up to my mailing list to be sure not to miss next weeks article.


Donate & Support

I've always wanted my photography education on here to be free, so although there is no paywall to any of my -Technique Tuesdays-, any and all support is greatly appreciated. ❤️

PLUS: Donate any amount and I’ll send you a link to the hi-res print version of my studio lighting book.

||

PLUS: Donate any amount and I’ll send you a link to the hi-res print version of my studio lighting book. || PLUS: Donate any amount and I’ll send you a link to the hi-res print version of my studio lighting book. ||


JHP Livestreams…

I livestream every other Tuesday night via YouTube and there I answer your questions, critique your shots, take community images into Photoshop to work on them and discuss all manner of lighting tips and techniques. I look forward to seeing you and your work there real soon. Jake Hicks Photography - YouTube


All of my more advanced lighting classes are now available online!

||

All of my more advanced lighting classes are now available online! || All of my more advanced lighting classes are now available online! ||

LEARN MORE ABOUT MY ONLINE WORKSHOPS

 
Tuesday 05.27.25
Posted by Jake Hicks
 
Newer / Older